Ricoh Theta offer a great selection of high quality 360 cameras. This guide will give you details on how to use their most popular consumer cameras: the Ricoh Theta SC2, the Ricoh Theta V and the Ricoh Theta Z1. To use these cameras, please follow these steps:
Setting Up
1. Download the RICOH THETA app on your mobile phone. This is available in the App Store and Android Store. If you don't yet have a Ricoh Theta camera, you can purchase one here.

2. Turn your phone's Bluetooth on.
3. Open the Ricoh Theta app. You will be asked to allow access to your photos. Select this option and click Allow Access to All Photos when prompted. Then click Start the App.

4. You will then be prompted to allow the app to connect to devices on your local network. Click OK.
Connecting your Phone to your Camera
5. Turn your Ricoh Theta camera ON.
6. Inside the Ricoh Theta app, click the Shooting tab at the bottom of your screen.

7. You will then be prompted to select your camera. If your model isn't listed, select Other models.

8. The app will then ask for access to your device's camera. Click OK.

9. Use your device's camera to scan the unique serial number and QR code at the base of your Ricoh Theta camera. Alternatively, click Enter with keyboard to manually enter this serial number via the app.

10. Your phone will prompt you to connect to your Ricoh Theta camera's WiFi Network. Click Join.

11. Click the blue Register button.

12. Optional: If you wish to automatically export your 360 photos to your mobile phone after you take each photo, tap the Settings icon in the top right hand corner inside the Shooting window. This will open a new menu.

Under the heading Image Shooting Settings, switch the Display After Shooting option to On.

Getting ready to Shoot
13. Connect your Ricoh Theta camera directly to your tripod / monopod.
Taking a 360 Photo
14. Now your phone is connected to your Ricoh Theta camera, you will be inside the Shooting section of the app. Here you can control and modify your camera settings and select what kind of media you wish to capture. For the best results inside your 360 tour, you will want to set your Option Setting to HDR Rendering.

16. Once you've captured your photos, these will automatically be saved to the Cam Images tab inside the Ricoh Theta app.
17. Continue taking your 360 photos for each room inside your space. For details on how best to take your photos, please see our Best Practice Guide.
Exporting your 360 Photos
18. If you didn't use the automatic export option detailed in Step 12 and the video guide above, you can manually export your 360 photos from the Ricoh Theta App as well. To do this, head to the Cam Images tab inside the Ricoh Theta App.

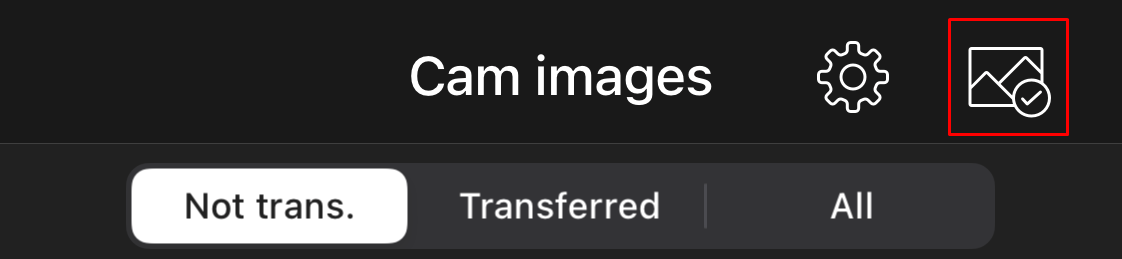
19. Here you will see a preview of all of your 360 photos. At the top of this page there is a filter with three options: Not trans. / Transferred / All. Transferred refers to any photos that have been exported and saved to your mobile phone. If you wish to review your 360 images, you can tap any of these photos to view a preview of these images.
20. When you're ready to export your 360 photos, switch to the Not trans. filter and tap the Select icon in the top right hand corner of your screen.
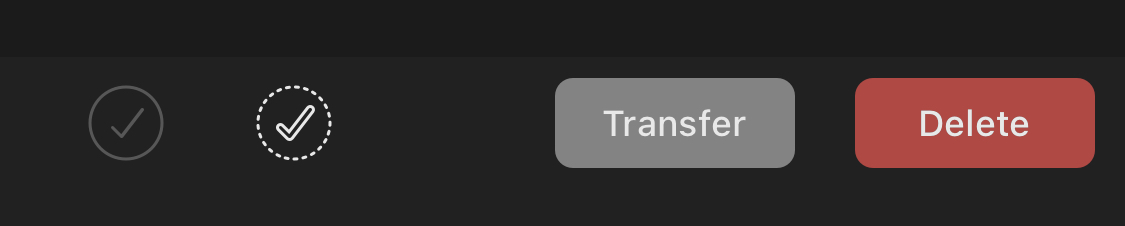
21. Tap your 360 photos to select those you wish to export, then click the Transfer button at the bottom of your screen.
22. Your 360 photos will then be saved directly to your phone's camera roll. You can proceed to upload these images directly to your EyeSpy360 account, or you can export them to another device via a USB cable.
For more information on how to transfer your photos to your EyeSpy360 account, please see this article linked below:
How do I transfer my 360 photos from my phone to my EyeSpy360 account?
Was this article helpful?
That’s Great!
Thank you for your feedback
Sorry! We couldn't be helpful
Thank you for your feedback
Feedback sent
We appreciate your effort and will try to fix the article